

คำอธิบาย
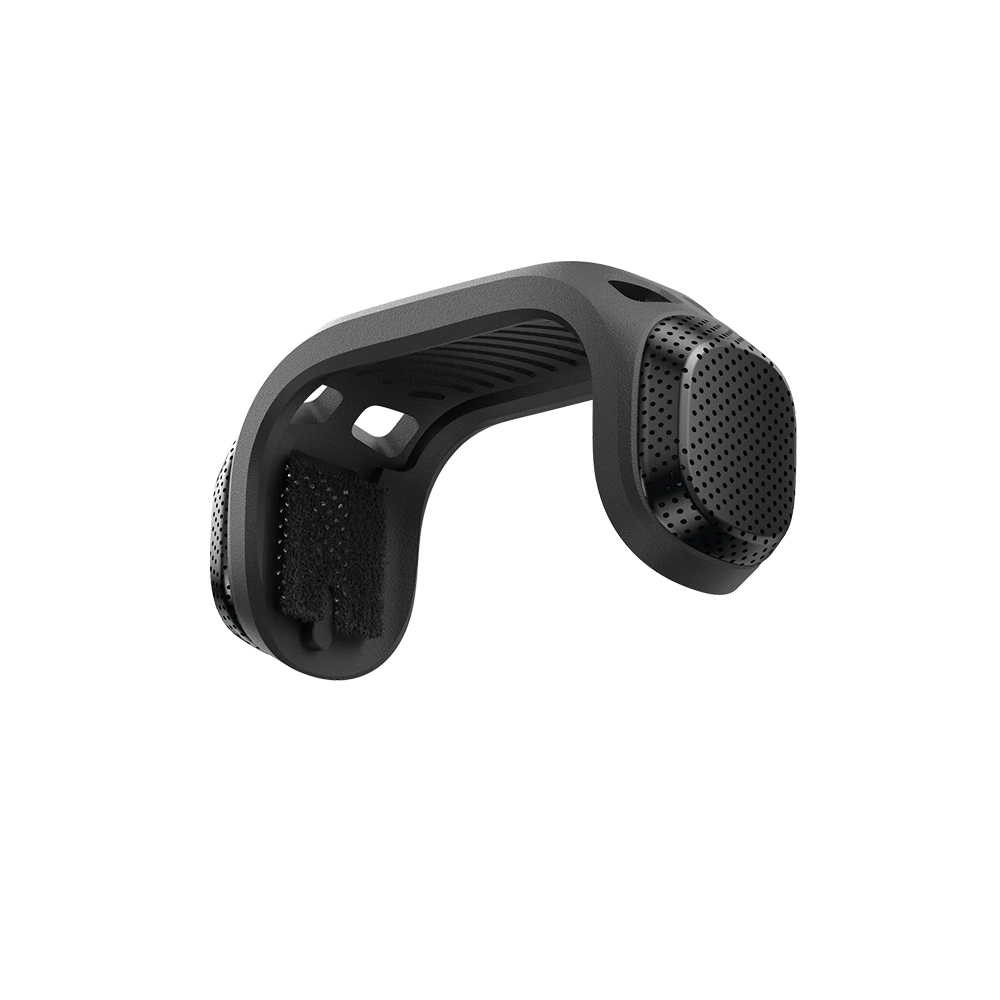
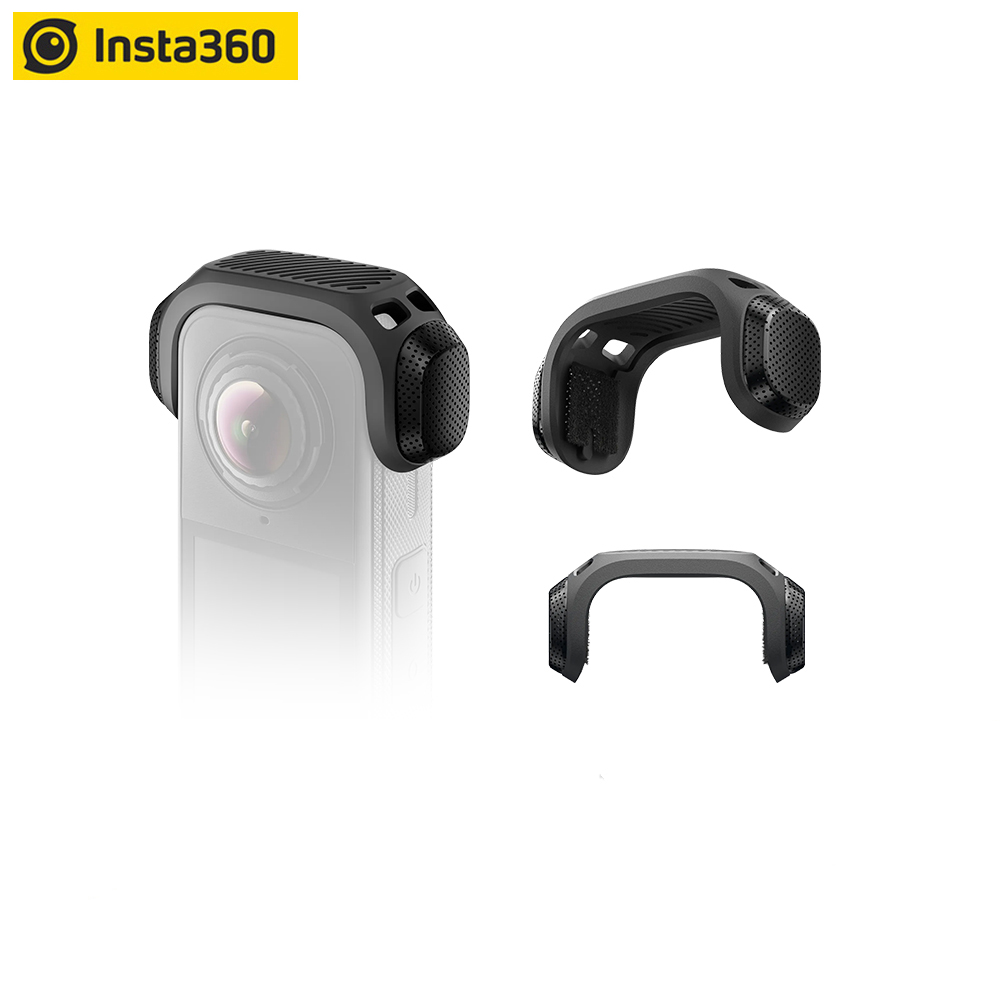
Insta360 X4 Air Mic Windshield ของแท้ By AquaproThailand
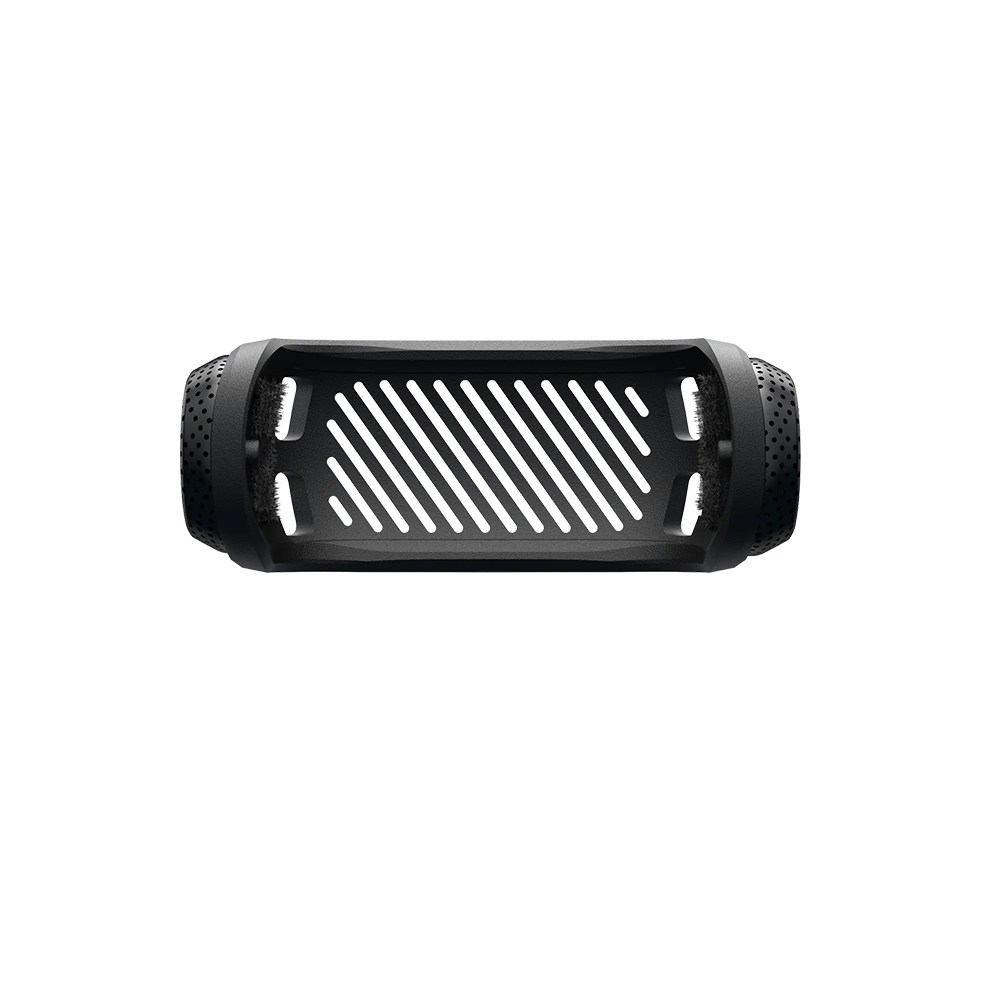
– Mic Windshield with quality acoustic foam inserts and metal mesh. Reduces wind noise, keeping audio clear and natural.
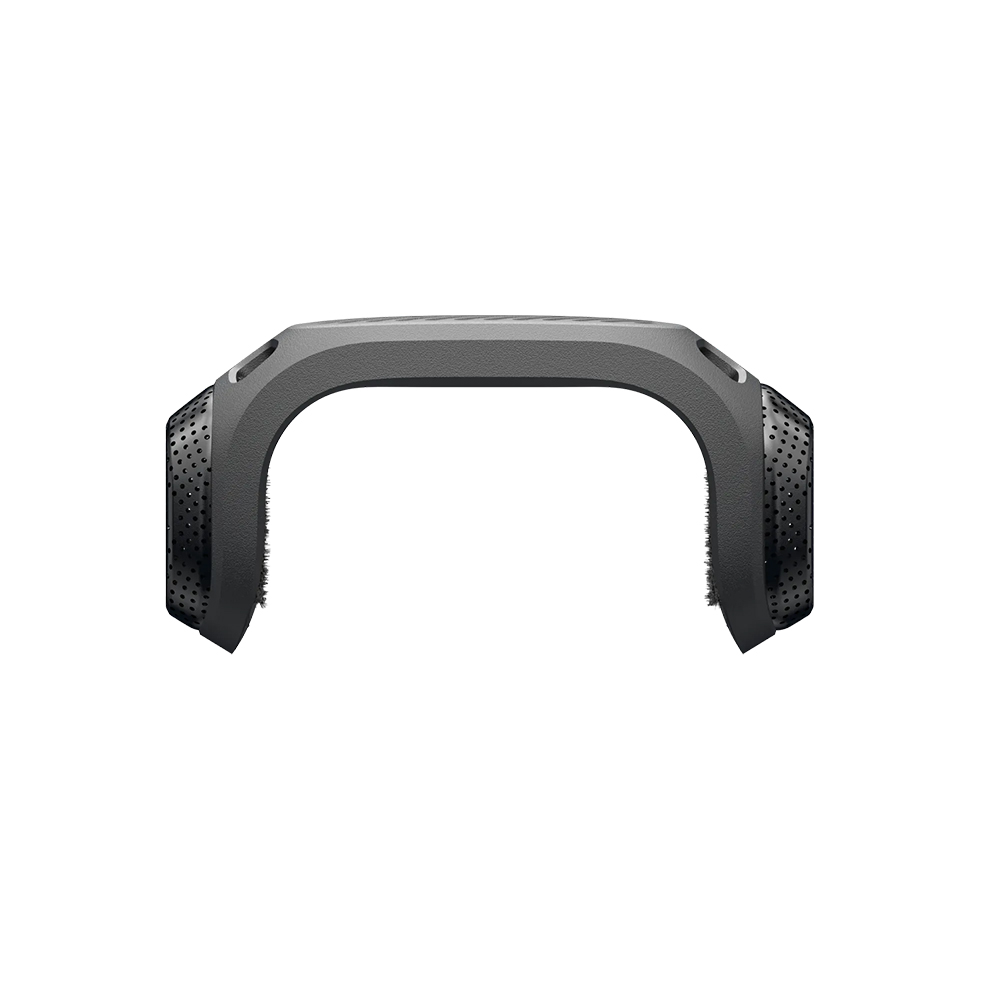
– Designed specifically for X4 Air. Stays completely invisible in 360 footage.
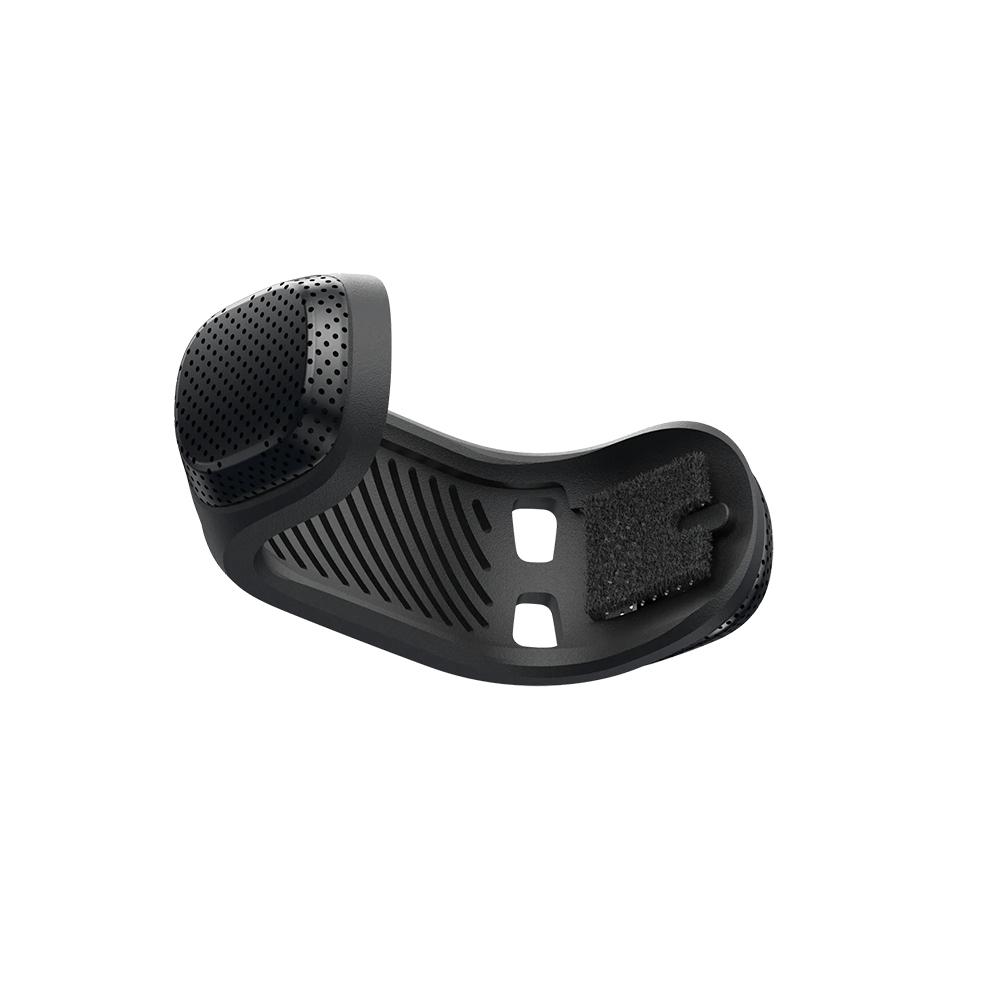
– Lightweight and durable, snaps on and off without the need for tools, adhesive or Velcro.
– Note: When using the X4 Air Mic Windshield, swipe down on the touchscreen to open the Shortcut Menu. Then swipe right twice to access Audio Settings and set the Auto Wind Noise Reduction Level to Strong.
Compatibility
X4 Air
– Mic Windshield
Cut through the noise.
– Clear, natural audio.
Contains high-quality metal mesh and acoustically tested foam inserts that cut out wind noise for crystal-clear audio, anytime, anywhere.
– Invisible in 360 shots.
Custom-designed for X4 Air, with a secure semi-enclosed design that remains completely invisible in 360 footage.
– Snap on, snap off.
Features a quick snap-on design—no tools, adhesive, or Velcro required. Mounts and removes in seconds for effortless use and portability.
In the Box
1x Mic Windshield Frame
6x Acoustic Foam Inserts
Specs
Weight:
8.5g (0.3oz)
Dimensions:
60.3×31×22.8mm(2.4×1.2×0.9in)
Materials:
Plastic, metal, foam
How to Use
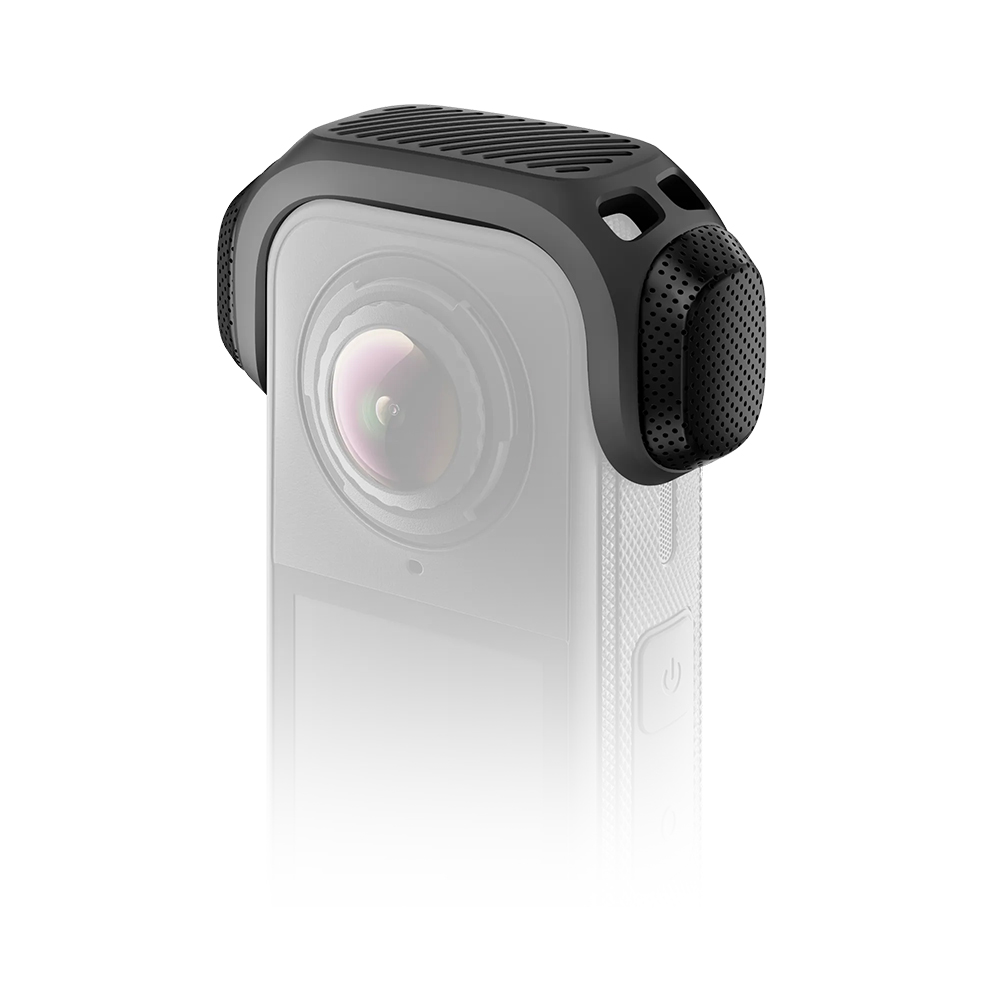
1. Install the Mic Windshield Frame
Install the Mic Windshield frame over the microphones on
either side of the camera, as shown below. Ensure the mark
on the frame aligns with the camera’s wind guard and the tabs
fit securely into the corresponding holes on the camera.
Change Acoustic Foam Inserts.
If the acoustic foam inserts inside the Mic Windshield get
damaged, you can remove and replace them. After replacing,
press gently to ensure they are secure.
2. Select Audio Mode
Power on the camera. Swipe down from the top of the
touchscreen to access the shortcut menu, go to Audio
Settings, and select “Auto Wind Noise Reduction – strong” for
clearer audio.
3. Remove
After use, slide the frame toward the back of the camera to
remove it. Do not pull the frame upward, as this may damage
the camera.
Notes
1.Ensure the microphones are clean and dry before installing.
2.Before you start filming, ensure the Mic Windshield is securely attached and not damaged, as this could affect the wind noise reduction performance.
3.For the best wind noise reduction, set the camera’s audio mode to “Auto Wind Noise Reduction – strong” before filming.
4.Do not use the Mic Windshield for water sports or on rainy days, as water could affect the wind noise reduction performance.
5.When not in use, store the Mic Windshield in a dry environment to avoid dampness and moisture.


